How to make achievable New Year's Resolutions, and how to succeed at them!


5 Great tips on how to make reasonable goals for the New Year and succeed at them! :) New Year's Resolutions


HAPPY NEW YEAR EVERYONE!


Wishing every single one of you a new year filled with lots of love, happiness, good health, and success!! :) 


Have any of you made any New Years Resolutions this year? This year, for the first time in a long time, I did! The reason I avoided them before was mainly because I just didn’t really seem to 'believe' in them… why is it that at one point in the year you have to suddenly make goals for the rest of the year? Why cant you make new goals for self improvement all year round? I also didn't like to set them as it seemed you were almost setting yourself up for failure. I mean the stereotype at this point is that whichever resolutions you do end up making, you will probably break in a matter of days.  You're setting yourself up for failure!

how to succeed at New Years Resolution tips

But this year I realized something. Maybe setting a resolution at the New Year is a good thing. Sure, we can (and should) make plans to make positive changes in our lives throughout the year, but one benefit of marking your start date as 'the new year' is it gives you a measure to, well, 'measure' your progress! You can see how you are progressing throughout the year, and next year at this time you can pat yourself on the back for 12 months of hard work. I also started thinking that maybe the reason we often fail  at our resolutions (and often so quick!) is because we are setting ourselves up to fail!


Maybe the problem isn't us, but the unrealistic and horribly planned out resolutions we make! So this year, I decided to outline how to make the very best New Years Resolutions for the new year, and more importantly, how to set yourself up for success and not failure! :)


How to Make Achievable (and set yourself up for success!) New Year's Resolutions


1. Be Realistic

Make sure your NYR are realistic. Don’t say you are going to read 10 books a month, ever month, for the next 12 months, when the last book you read was 2 years ago. Don’t say you are going to go to the gym for 2 hours a day, every day, for the next 365 days when you have never stood foot inside a gym. One reason many people end up failing at their NYRs is that they make far too unrealistic ones. Sure, we would all love to be fitness freaks who are well read, but if this is your first step towards such greatness, don’t expect expert levels of skill and commitment! Small attainable goals are much more realistic. For example, if you have never stepped inside a gym, maybe one goal would be to get an actual gym membership, another may be to go a minimum of once a week, for the first 6 months, and then twice a week for the rest of the year. Instead of aiming to read 10 books a month, why not aim to read 1 in January, 2 in February, 3 in March, and so on. It will be much less daunting, much more realistic, and will give you a chance to get in the groove of things.

2. Be Mentally Ready

Make sure you are in the mindset of what you are setting out to do. For example, you may look in the mirror and see a nice little muffin top, and think, hey….I should probably hit the gym to get rid of this. But that’s not enough. You need to mentally prepare yourself. You need to come to terms with 'going to the gym is going to really suck at first', and see if you are willing to commit to the suckage. Most people tend to make NYRs about things they don’t like about themselves, but they aren’t actually willing to put in the effort to change. If you are not ready to do it, then don’t pledge that you will! You are simply setting yourself up for failure.

3. Prepare

Leading from being mentally ready, its not enough to simply be 'ready' to take on a new challenge, you need to actually plan for it in order to succeed. For example, if you want to try to eat healthier this year then you are going to need to plan. You need to come up with meal plans, grocery lists, and ideas for lunches to pack to work. If you are now making the more realistic resolution of reading 10 books in the new year, maybe you should help narrow down which books they would be. You can pick out which 10 exactly, and put them on your bedside table. Or at the least you can make a book list of potential reads to help you pick as you go. Preparation is key!

4. Challenge yourself, but don’t be too hard on yourself

Its important that you are realistic about your goals, and not too hard on yourself, but also make it a challenge! Reading 120 books in one year is way too much of a challenge, but reading just 1 book is not much of a challenge at all. Push yourself to improve in whichever area you want to improve yourself in, but DON’T over challenge yourself. It's all about moderation!

5. Create general categories of improvement

If there are several areas of your life you want to improve upon, I feel the best way to help you be successful in your NYRs is to make overarching general areas for improvement rather than very overly specific goals. For example, if your NYR this year is to do yoga every single day on your lunch break at a specific yoga studio across the street, then that may be setting yourself up for failure. What about the days work projects run late and bleed in to your lunch hour, what about days you're sick with the flu, what about days you just darn don’t feel like it? (Remember - don’t be too tough on yourself!) A better goal would be to have the general category of "I'm going to do more yoga this year". Then within that category you can make the following goals: "I will attend at least one yoga session a week at the location near my work, during my lunch break. I will join an outdoor yoga group in the summer. I will make a space in my home to practice yoga once a week." This way if you are having a tough week and can only attend one yoga lesson during your lunch, you wont be discouraged and feel bad. But if you have time and go three times in a week you will be super encouraged by breaking your own goals for yourself! YAY! GO YOU! :)


So What are MY New Year's Resolutions?

I've decided to focus on two general areas of my life:

  1. My overall health
  2. Blogging!


Health

I'm going to do my best to generally make healthier lifestyle choices from what I eat to the activities I do.

I'm going to do my best to try to incorporate more and more veggies into every meal

I'm going to try my best to pack a healthy lunch at least twice a week (and work my way up from there!)

I'm going to try to continue educating myself on healthy choices and foods

I'm going to move more! Confession: I am about the laziest person you will ever meet when it comes to exercise. I HATE it. Despise it. But this year I'm going to try to hate it just a little less. Being realistic I'm setting a goal of working out in some way at least ONCE a week. Since I have no plausible excuse why not to, I think I'm going to have to stick to it! :) Hopefully from there I will be able to gradually increase it to several times a week

Learn yoga. A girls gotta start somewhere….ill start with actually figuring out the basics!


Blogging

I really want to commit some serious time to this whole blogging thing :)

SO I am committing myself to learning and growing my blogging in 2016. I am hoping on posting at least 4 times a month (roughly once a week) and maybe grow from there. (If you have the same resolution and want to check out my Pinterest board with all the cool articles I've been collecting on 'how to blog', check it out HERE!)

I'm also hoping to expand my social media presence (though I'll have to do some learnin' on how to make that happen first! Anyone have any tips for me? (Check out my Pinterest Board HERE on Social Media tips and tricks – see? Planning is key ;) )

I'm also hoping on improving my food photography skills. I have come a long way form my early days but still have a lot to learn! I would like to learn more about the food 'styling' side of food photography and more about lighting details. If you are looking to improve your food photography too, check out this Food Photography Pinterest board I have going on!


SO those are my New Year's Resolutions! What are yours? How do you plan to tackle them? Let me know in the comments :)


Lets make 2016 our year! :)

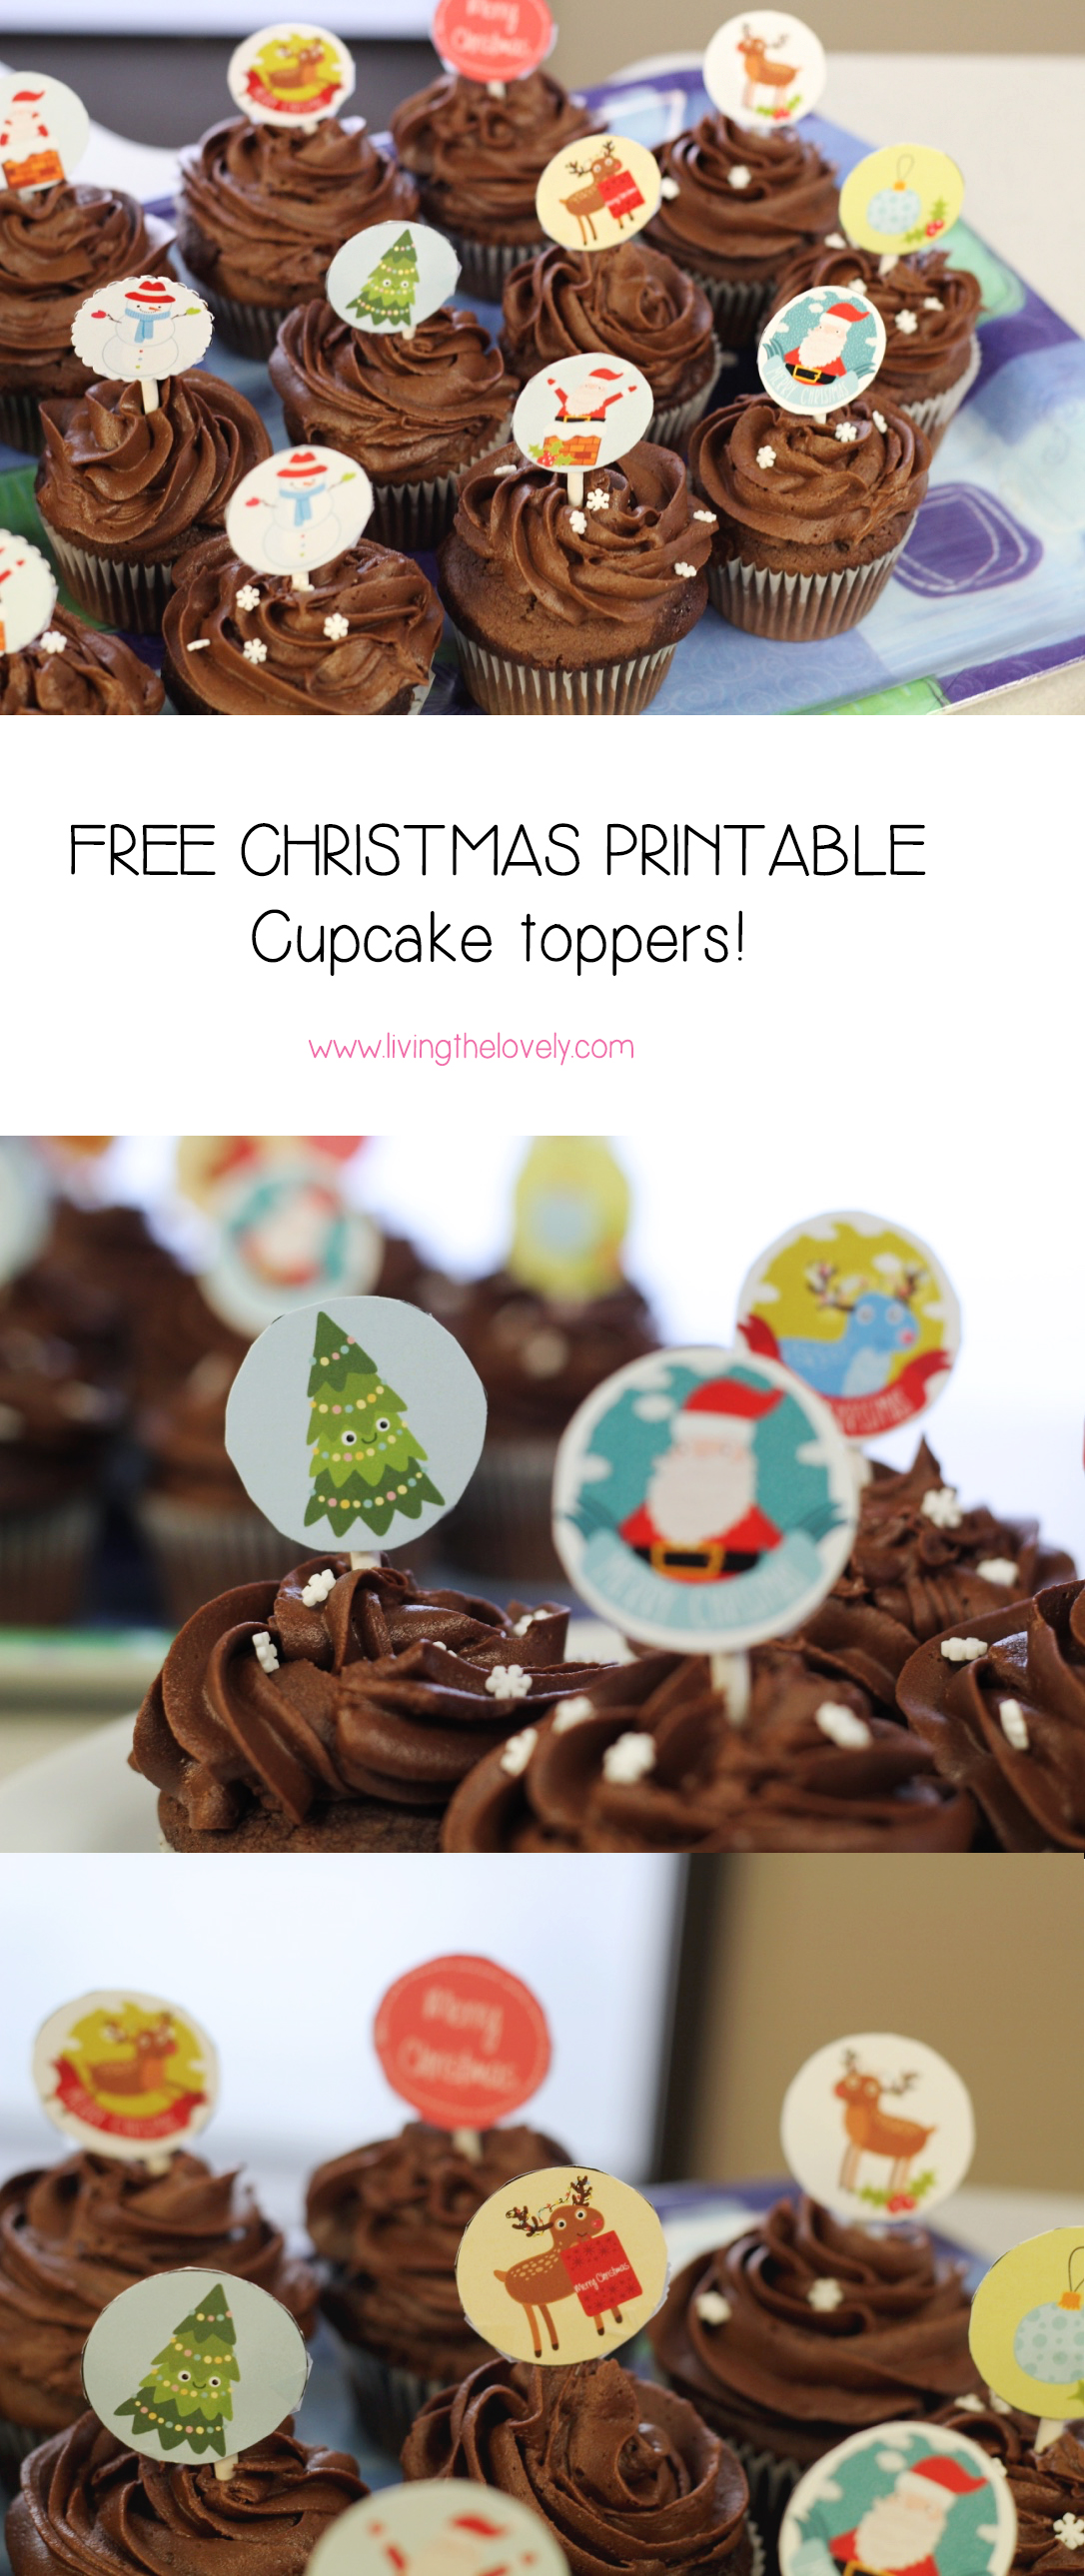
Merry Christmas! And a free Christmas cupcake topper printable

Hello everyone!

So sorry about the late post. I was planning on getting this up wayyy before Christmas so that people could actually, you know, use them for Christmas. Alas, that was not to be, but I figured I should share them now anyways so that maybe you can use them for next Christmas! And now you have 365 days to plan ahead! ;)

So the reason I fell behind on posting these is I kept planning on baking the actual cupcakes and making the home made frosting, making the toppers and posting them. I had already done it for my office's Christmas party this year, and had snapped a few pics of them (in my office!), but I was planning a whole photoshoot to get some real nice pics. However, since that proved next to impossible, I decided to just share a few of the pics I took from work, so please excuse the less than stellar shots!

These were a great hit at work and everyone loved them! I piped a swirl with Wilton's 1M tip, and sprinkled some white snowflake sprinkles on some of the cupcakes and left some plain. I then stuck on the printable cupcake toppers. Everyone was really impressed with it and I even got asked more than once if I had purchased them from somewhere! WIN FOR ME! :D

Anyways without further adu, here are some pics of the final result, followed with a link to the actual free Christmas printable. What you want to do is to either print it either at home or at a printing centre (I printed at Staples!), preferably using thicker stock paper, then cut out, and stick on to lolly sticks or toothpicks. Easy as that! If you do end up trying them please send me a pic - I would love to see it! :) Merry Christmas! 

A FREE Christmas Printable! Its a series of super cute christmas themed cupcake toppers you can print at home! Great for a fancy looking treat to take to a Christmas Party!

Super Easy Natural Homemade Butter!


How to make homemade all natural butter! Super easy with step by step pics! Makes such soft and creamy butter!


Wow 3 posts in one week! That sure is a first for me…here's hoping I can stick to a more consistent posting schedule! Today I'm sharing a really neat 'recipe'. The reason I put a ' ' around the recipe is that it's not so much a recipe but an old method that has been used for centuries by humans – namely, butter. Most of us who have been born and raised in big cities have never been exposed to the process of making butter. Sure, we know it comes from milk, which comes from cows, but that’s about where most people's knowledge on the butter making process ends.

 Back when I was in third grade, our class had a 'live like a pioneer day', where we were supposed to dress up like pioneers and live as they would have. This included no electricity or paper, which meant working on mini chalkboards with the lights off! This was quite fun for a third grader and we really enjoyed the experience. But what made it even more fun was, the thing that makes everything more fun, the food! In class we made our own bread by mixing up the flour with the rest of the ingredients, and setting it out to poof. Then our teacher baked the bread during lunch break in the staff's kitchen. It was all really amazingly fun, and it’s a memory I still think back on and smile. But perhaps what was most fascinating to 8 year old Zahra was what we made in class to go 'on' the homemade bread – homemade butter! Our teacher poured some whipping cream into a jar, and screwed the lid really tight. She then asked us to sit in a circle and pass the jar around one by one, with each of us shaking the jar vigorously with our hands until we couldn’t shake anymore! I remember being both skeptical and in awe….could *we*, the young little children of room 3, truly, possibly, make… butter?! SO shake, and shake, and shake we did, each of us hoping that *we* would be the one who made the magical shake that turned the cream into butter. Finally, after a good 20 minutes of shaking the cream, EUREKA! We had butter! Of course it was a bit soft and liquidy, but we didn’t care! We made butter! We slathered it on some of our homemade bread, and boy was it a delicious snack on a dark (since the lights were off) afternoon.


Make super soft and creamy homemade butter! Super easy with step by step pics!

Since then I have always wanted to go back and 'try' it myself – to recreate this homemade butter, but this time do it 'right'. You know. The adult way. However, every time I needed butter I would do the normal 'adult' thing to do – which was buy it from the grocery store. However, about a week ago I was helping my mom with the groceries when I noticed the whipping cream we usually get was on sale. I grabbed a package of it, with the plans of baking something (wasn’t quite sure what yet), and headed to the cash. However, at the cash I realized ' aww man, I forgot the butter!' Anyone who has walked alllll the way across a huge grocery store to the check-out cash, only to remember that they forgot to pick something up on the other end of the store, will know that you will come up with any excuse to NOT go back. At that moment while holding a 1L container of whipped cream, all I had to do was look down at the excuse I was so conveniently holding – I'm going to make some homemade butter! :D

So here it is - how to make butter. It's surprisingly easy and actually makes a delicious final result! It’s a very nice fluffy and SOFT butter that you just don't get in the store bough kind. Best of all, it's healthy, natural, and preservative fee! And if you like you can even buy organic whipping cream and make some organic butter! Yum! 

So lets begin, I've outlined the basic ingredients and steps needed, but this needs a bit more of a visual so I have some step by step photos / personal tips for you too. 


How to make homemade all natural butter! Super easy with step by step pics! Makes such soft and creamy butter!

Homemade Butter

  • Whipped cream – at least 35% (nothing less)
  • Salt to taste (optional) – I make unsalted butter
  • ICE COLD water
  • Something to make it with. I made it in my kitchen aid mixer, but you can make it with a hand mixer or even a jar like I did in the third grade :) 
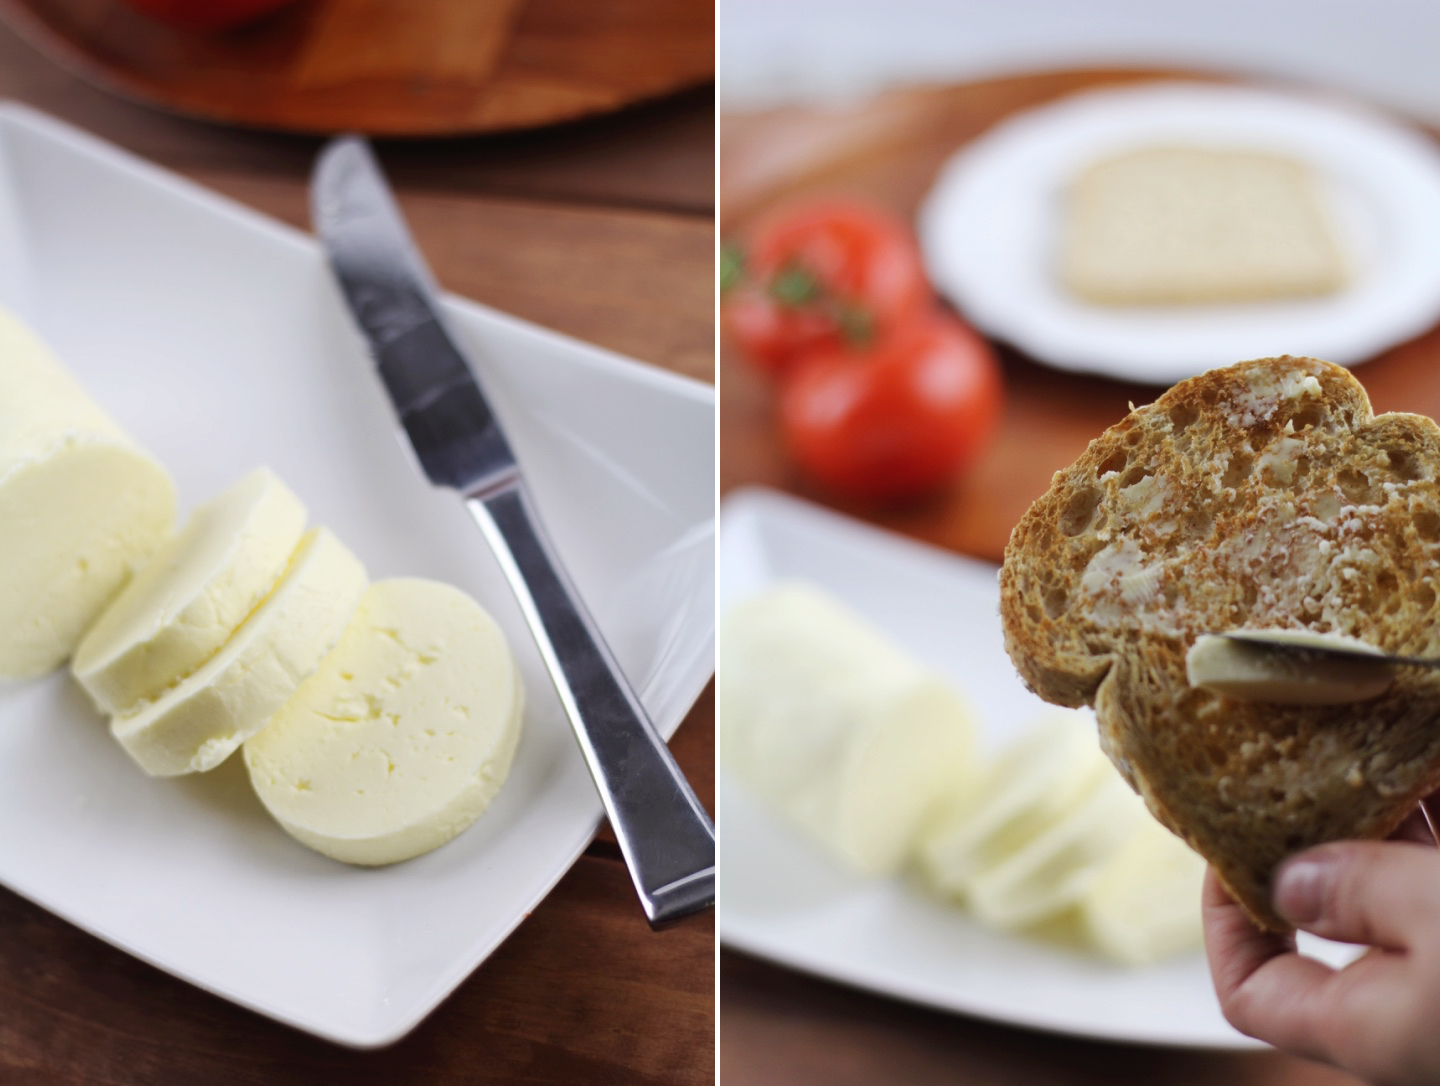
  1.  Pour your cream (no measurement… however much you want. I used ¾ of a 1L container but you can use more or less depending on how much butter you want) into your stand mixer. Beat the cream at low-medium speed until it turns into whipped cream. Then beat at high speed until the cream curdles and makes chunks.

  2. At a certain point it will start 'leaking liquids'. At this point you want to cover your mixer with a cloth or plastic wrap to prevent splashing. Keep beating until you have hard formed butter in your mixer (see pics below). At this point you want to drain that liquid out – but keep it! This is butter milk and can be used in lots of yummy recipes!

  3.  Add some ICE COLD water to your butter (1/2 – 1 cup depending on how much butter your making). Beat the butter and ice cold water together (be careful of splashes!) for a few minutes. Then stop and drain the water (it will be a bit murkey). Then repeat the same steps again. I do it about 3 times or until the water is kind of clear. This is done to 'clean' your butter and draw out all the moisture. This allows your butter to last longer without going bad. If you are going to consume your butter in the next few days then you can skip step 3.

  4.  And that’s it! Once you have beaten the ice water with the butter to the point that the water isn’t too murky, you can drain the remaining water and 'pat' the rest out with your spatula. And there you have it! Butter! You can put it in an airtight container and it lasts for a good month!


And heres a visual of the above, which is also pinnable! :)

a step by step tutorial on how to make homemade organic butter! (theres two parts)
how-to-part-2.jpg


a great guide on how to make homemade all natural butter! Who would have thought butter could be so easy to make at home? and so soft!

Free Printable - Christmas themed Santa's Milk and Cookies


Hello my Lovelies,

Look what I made! A Christmas themed printable. Just for you :)


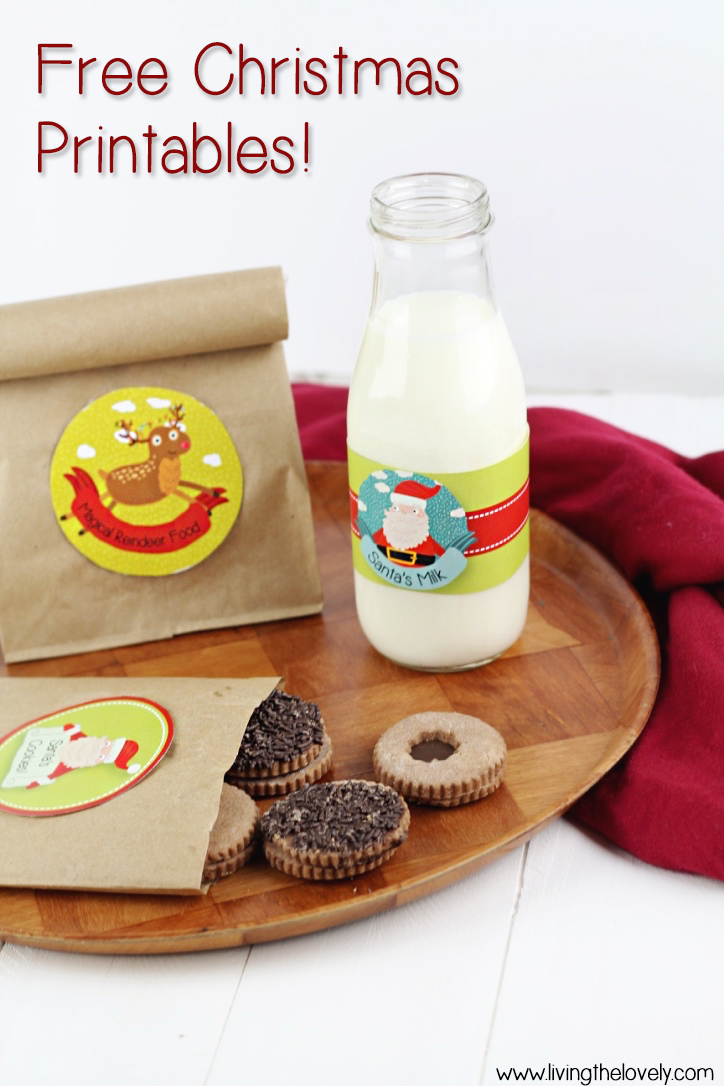
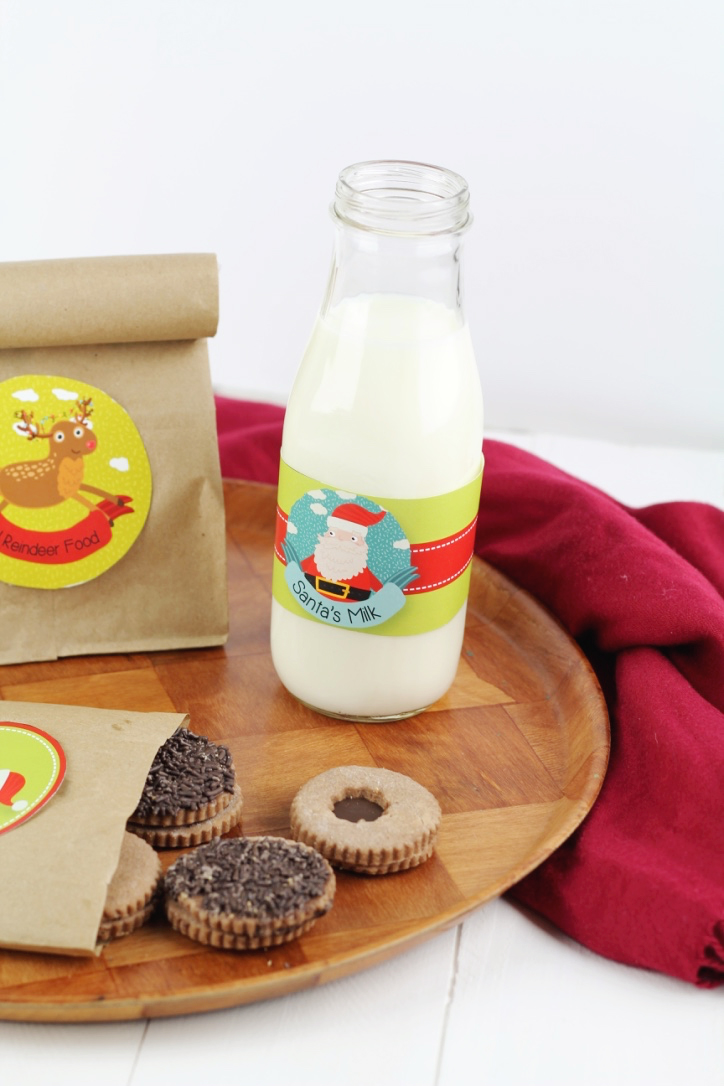
A Free Printable for Christmas! Print out and stick on a Label for Santa's Milk, Santa's Cookies, and some magical reindeer food! ;)


Its a cute little printable that I'm sure kids (and adults alike) will love! Its a really quick and easy craft which you can make with the kiddos on Christmas eve. This year instead of just putting out a glass of milk with a plate of cookies why not get more creative - I'm sure Santa will be pleased! ;)

A Free Printable for Christmas! Print out and stick on a Label for Santa's Milk, Santa's Cookies, and some magical reindeer food! ;)


One of them is a printable for 'Santa's Milk', the other is a printable for 'Santa's Cookies', and an extra bonus for Santa's reindeer! Santa might get well fed on Christmas Eve, but what about poor Rudolph and Dasher, Dancer, Prancer, Vixen, Comet, Cupid, Donner, and Blitzen ? Carrying all those gifts can be pretty tiring, so why not leave out some baby carrots or other treats for some Magical Reindeer food!

A FREE Printable for Christmas! Print out and stick on a Label for Santa's Milk, Santa's Cookies, and some magical reindeer food! ;)


And since 'tis the season' , I'm sharing these printables with you free of charge! :) Enjoy and please feel free to share with me pictures of how they turned out either through the comments or email, or even through my social media....I would love to see how they turn out!


Happy Crafting and Happy Holidays :)

A Free Christmas Printable! Print out and stick on a Label for Santa's Milk, Santa's Cookies and Magical Reindeer food! A great fun little craft for the kids for Christmas Eve!


And in case you would like to pin this ;)


A fun little christmas printable ! And more importantly its free ;) Its a great DIY craft to do with kids on Christmas eve :) Santa's Milks, Santa's Cookies, and Magical reindeer food!

Super Soft Thumbprint Butter Cookies

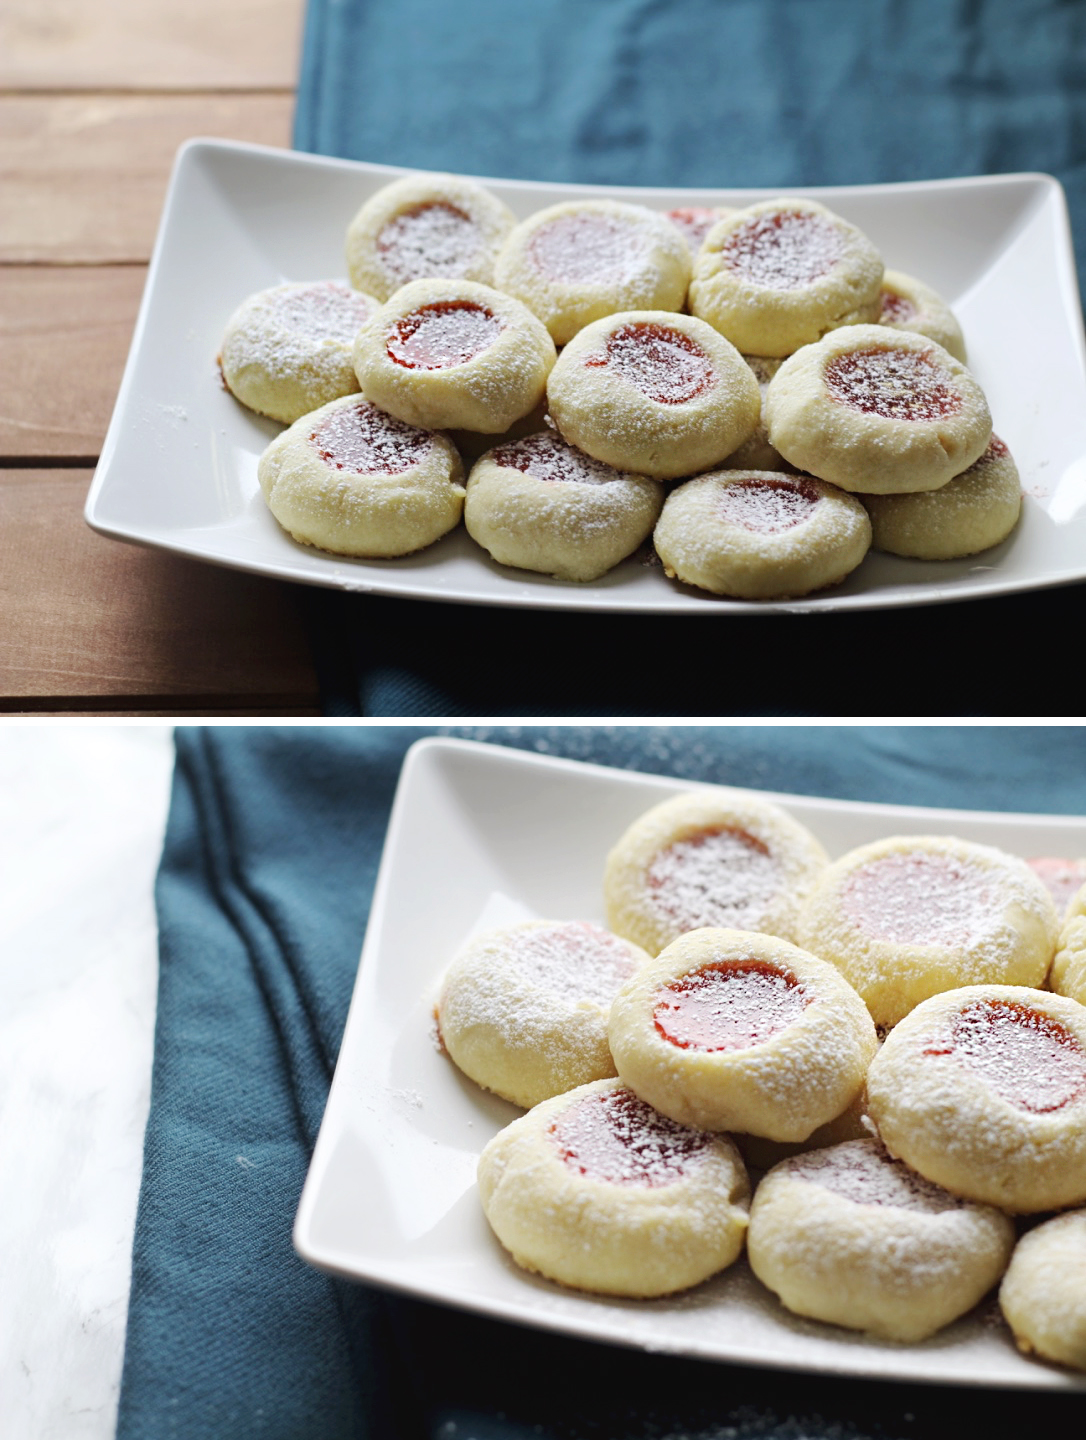
These cookies are seriously sooo quick and easy to throw together (only 5 ingredients!) and make the yummiest melt in your mouth butter cookies. These thumbprint cookies are a great addition to my Christmas cookie plate!

OH. EM. GEE. 

YA GUYS. These cookies. They are to die for. Not only are they super soft and just *melt* in your mouth, they are super, duper, easy to make. Like I'm talking ONLY 5 ingredients! It's so easy and has ingredients that any basic pantry would have. This may lead you to think "well it can't be so good if it's so basic". But you would be wrong, friend. Very wrong. 

I like to make a batch of these to take to work around the holidays and they are always a great hit. Its a very simple cookie and appeals to most palettes, and you would be hard pressed to find someone who 'hates' soft melt in your mouth butter cookies. In fact they were so good my health conscious boss even asked for seconds!

These cookies are thrown together real quick but make a really nice, smooth, easy to work with dough. I used my kitchen aid mixer, but you can of course use a regular mixer. Its just a basic 'mix your butter with sugar, beat, then add the rest' kind of recipe. The result is a super delicious butter cookie that melts in your mouth. They are great both warm and cooled. They aren't too sweet so its a great 'base' cookie - the cookie itself is soft and melt-y, but you can add other treats to make it sweet such as jam, chocolate, and icing sugar.

Its a great Christmas cookie recipe, but honestly I would have them all year round. Its a great base so I plan on trying different recipes in the next little while to see how they come along. So if you are looking for a great quick and easy Christmas cookie look no further than these soft butter cookies. Ok. I think I might have accidentally over hyped these cookies, thus causing extremely high expectations that no cookie could live up to. Forget what I said. They are just 'meh' cookies. 'Meh' cookies that I highly suggest you make ;)


These cookies are seriously sooo quick and easy to throw together (only 5 ingredients!) and make the yummiest melt in your mouth butter cookies. These thumbprint cookies are a great addition to my Christmas cookie plate!
5.jpg

Soft Thumbprint Butter Cookies

Ingredients: 

  • 1 cup softened salted butter (BE SURE to use butter - no margarine here please!)
  • ½ cup icing sugar, plus a little more for dusting the cookies at the end
  • 2 teaspoons vanilla
  • ¼ teaspoon salt
  • 2 cups flour
  • ½ cup jam (any flavour but I usually use Strawberry or Raspberry)
  1. Preheat oven to 325°F. Line a baking sheet with parchment paper. Be sure to do this because unlike other cookies made with a high butter base these cookies stick to the pan!

  2. In a bowl (or your kitchen aid mixer with the paddle attachment), beat the butter and sugar together until light and fluffy. Add vanilla and salt. Switch to low and gently mix in flour, just until combined - you don't want to over mix!

  3. Roll balls of dough into 1-inch balls (about 1 tablespoon each). Place dough balls on parchment lined baking sheets. Press down the center of each ball with your thumb (they are thumbprint cookies after all!). I have also used the back side of my teaspoon measuring spoon before too!

  4. Fill centers with a teaspoonful of the jam of your choice. Bake 12-15 minutes, making sure to not over bake. The baking of these cookies is a bit special - when they are ready they wont look ready because they wont get golden brown on the tops. That's ok. We don't want them to! When it gets golden on the top it means its over baked and will result in a dry cookie. Instead, to check if the cookie are ready carefully check the undersides to see if they are golden. If the cookie lifts (it wont if its not baked) and is golden underneath you are good to go! Let them cool on the baking sheet, then transfer to cooling rack.

  5. When cookies are completely cooled (otherwise it will melt into the cookies), dust with icing sugar. Cookies can be kept in a container for a few days (though they probably wont last that long!)

If you try the other flavours let me know how they turned out :)


These cookies are seriously sooo quick and easy to throw together (only 5 ingredients!) and make the yummiest melt in your mouth butter cookies. These thumbprint cookies are a great addition to my Christmas cookie plate!
quick and easy Christmas cookie recipe anyone? Super soft butter cookies that just melt in your mouth :)